
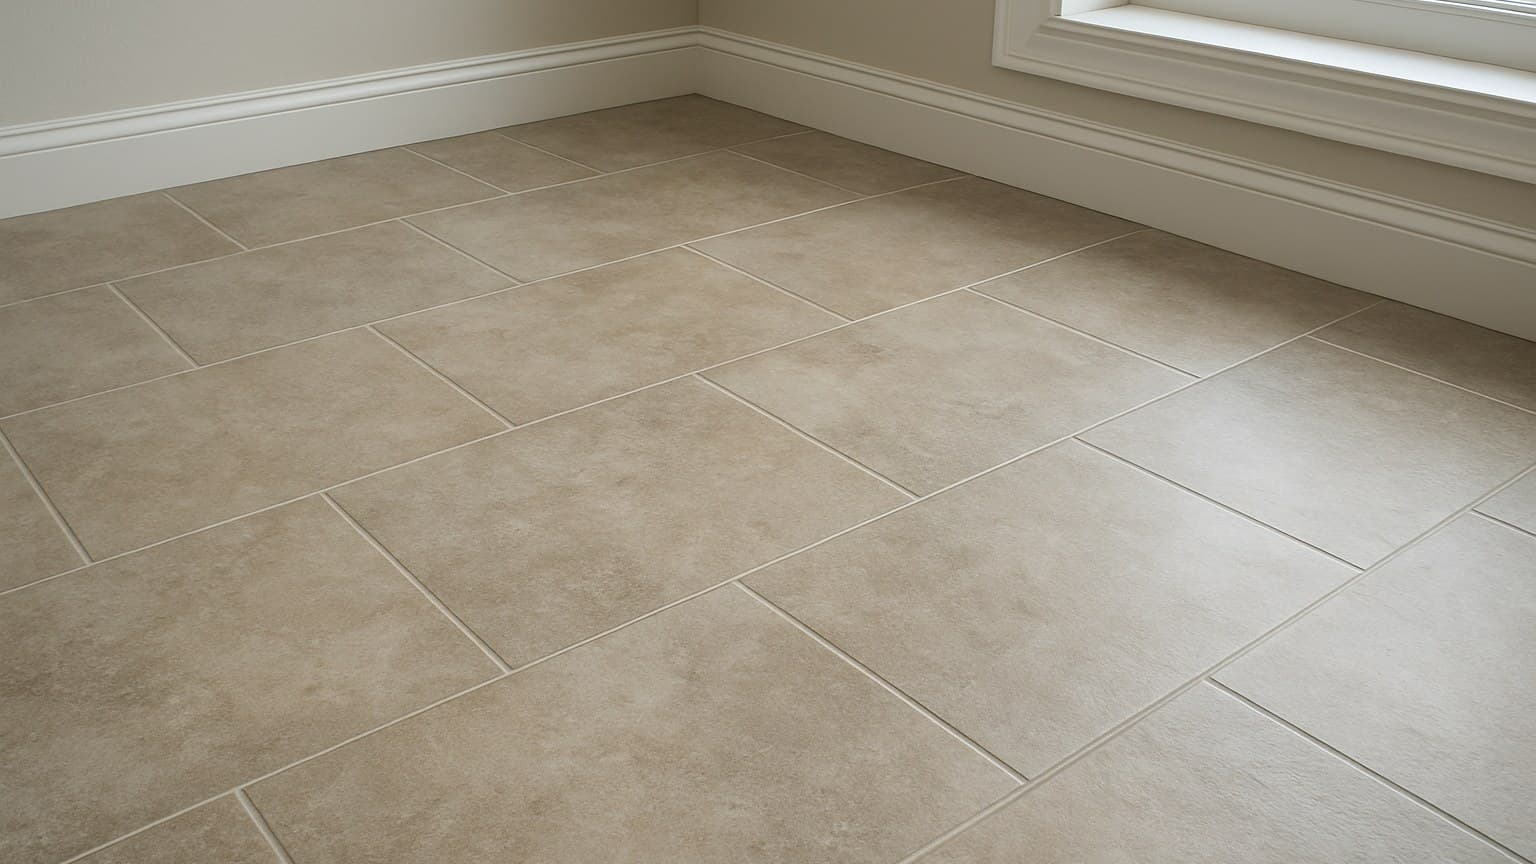
Laminate flooring that looks like tile can fool almost anyone standing over it, but the details that decide whether it lasts hide at the seams and under the plank. Get one of them wrong and you pay for the floor twice. Here's the checklist I actually run before I'll commit to laying it.
Key takeaways
- The look is faked with a printed image layer and a beveled edge that mimics grout, plus embossed texture you can feel; the bevel is also the first place it chips if the core is soft.
- Materials run about $1-5 per sq ft for tile-look laminate vs $2-7 for porcelain, but the bigger gap is labor: floating laminate installs for roughly $2-5 per sq ft against $5-14 for setting tile.
- No laminate is truly waterproof at the seams. A 'waterproof core' plank can still swell if water sits in the fake grout lines, so it only wins in a bath or kitchen when you wipe spills fast and seal the edges.
- Check the AC rating before the color: AC3 is the floor for a busy kitchen or bath, AC4-AC5 for entryways and heavy traffic (NALFA / EN 13329 scale).
- Flatten the subfloor to the maker's spec and test slab moisture before a single plank goes down; on my jobs, nearly every callback traced back to prep, not the plank.
First, What Tile-Look Laminate Actually Is (and What It's Called)
It's a standard laminate plank or square built to imitate stone or ceramic. Brands sell it as "tile-look," "stone-look," or laminate tile flooring, but under the marketing it's the same product family as any other laminate.
According to NALFA (the North American Laminate Flooring Association), laminate flooring is built from four layers. A high-density fiberboard core (HDF, a dense pressed-wood board) is the body. On top of that sits a printed image layer that carries the photo of stone or ceramic, then a clear wear layer that takes the scuffs, and a backing layer underneath that keeps the plank flat.
This guide is a jobsite checklist, not a sales page. The same eight checks apply whether you're looking at big 12x24 planks or smaller 18x18 squares, and I compare it against real porcelain further down so you can see where each one wins.
The layers of a tile-look laminate plank, outermost first.
1. How the Fake Grout Line Is Faked, and Where It Cracks
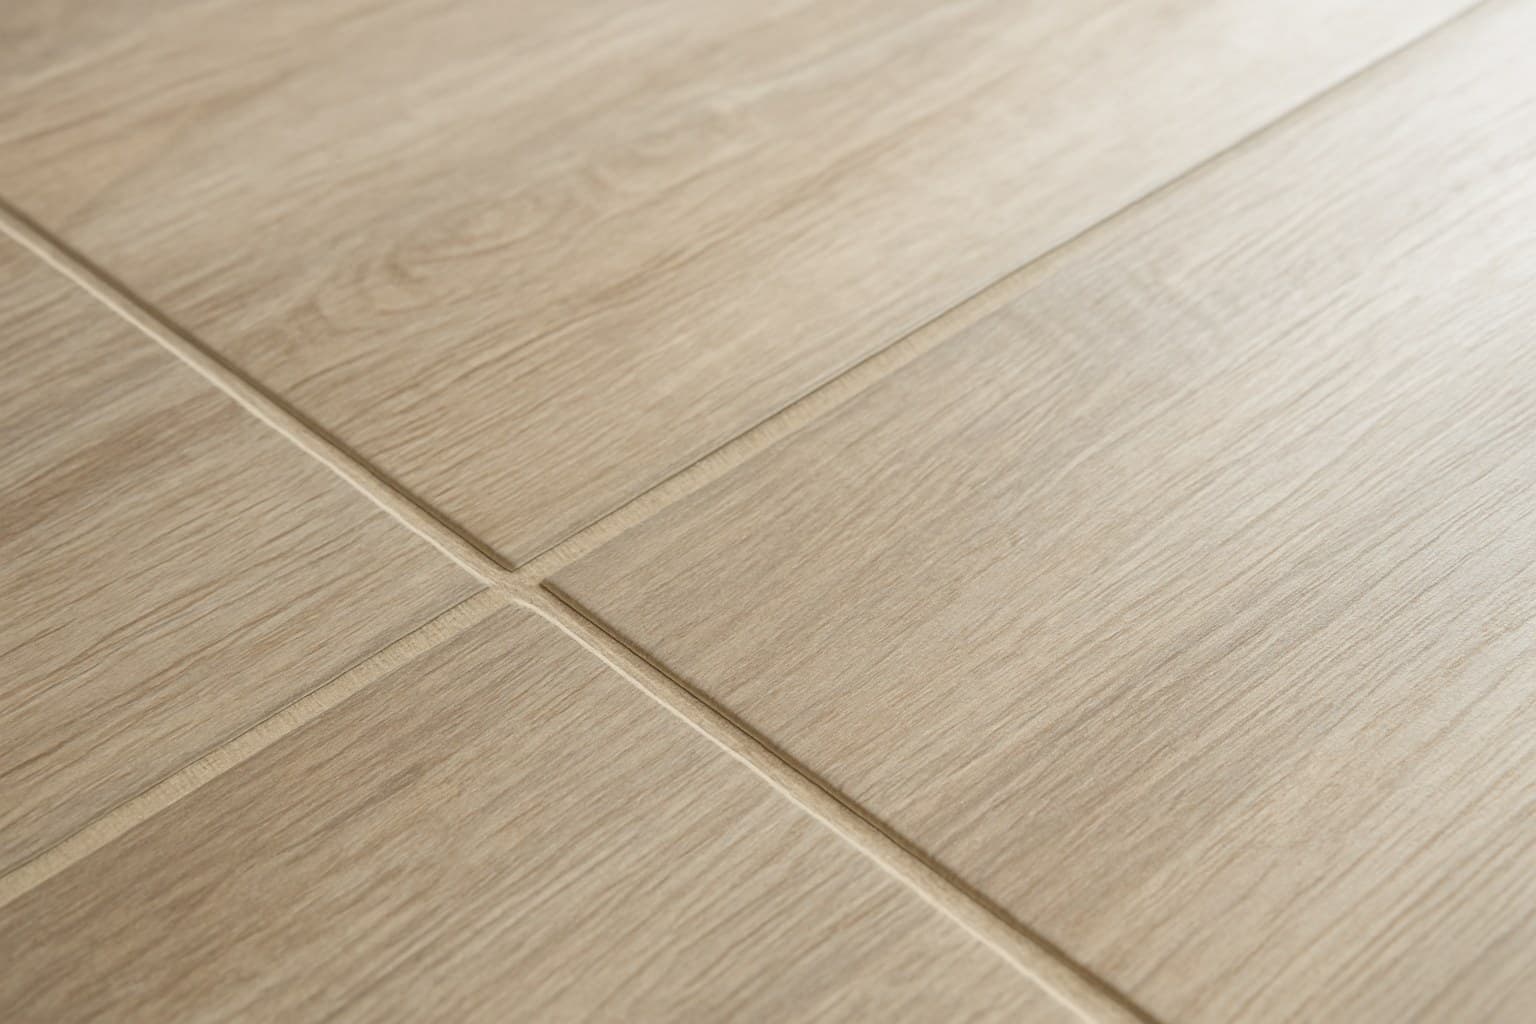
The "grout" is a shallow angled groove pressed into each plank edge, called a beveled edge. Paired with a painted grout tone and embossed texture, it reads as a real joint from standing height. On the good stuff you can catch a fingernail in it.
What sells the look is embossing that lines up with the printed image, so the texture sits exactly where the printed grout line is. In the trade that's called embossed-in-register: the recessed feel matches the picture instead of running across it randomly. That match is the difference between a convincing floor and an obvious fake.
Here's where it fails. On cheap planks with a soft core, that bevel chips under a dropped pan or a chair leg dragged across it, and the bevel is also the low point where a spill pools first. So the feature that makes the floor look real is also its weakest spot.
Before you buy, look at a sample under a raking light. That just means holding a lamp almost flat to the floor so the shadows jump out. It exaggerates any repeat, and cheaper lines recycle the same tile photos across several planks, which your eye picks up once you know to look.
The bevel that sells the tile look is also the low spot where water pools and the soft cores chip, so it's the first thing I press with a thumbnail on a sample.
2. The AC Rating: The Durability Number I Check First
The AC rating is the number that predicts how a tile-look floor holds up, and I check it before I even look at the color. AC stands for abrasion class. I want AC3 as a minimum for a kitchen or bath, and AC4 to AC5 for entryways, mudrooms, and busy households.
This scale is set by NALFA (the North American Laminate Flooring Association) and EN 13329, the European lab standard that tests the same kind of wear and impact resistance, so it's a class you can verify off a spec sheet, not a word a marketing team invented.
A gorgeous stone print on a low AC core scratches straight through to the image layer, and once that happens there is no fixing it. You can't refinish laminate the way you sand and recoat hardwood. The print is the floor, and a scratch through it is permanent.
One more trap: a single brand often sells an AC3 line and an AC5 line under the exact same tile look. Read the class off that specific product's own sheet, not off the display sign. Mohawk's tile-look laminate lines are a good example of why this matters, the AC class is printed right on that specific product's own spec sheet or box, not implied by the collection name, so pull that document (or the label on the box in the showroom) for the exact SKU you're buying rather than trusting how "heavy-duty" it looks in the display. If you want a shortcut past that guesswork, our best laminate flooring brands guide lists which lines actually earn the higher AC ratings.
| AC class | Rated for | Good for a tile-look floor in |
|---|---|---|
| AC1 | Moderate residential | Closets, low-traffic bedrooms |
| AC2 | General residential | Living and dining rooms |
| AC3 | Heavy residential / moderate commercial | Kitchens, baths, hallways (my minimum) |
| AC4 | General commercial | Entryways, mudrooms, busy households |
| AC5 | Heavy commercial | Overkill at home, but bulletproof |
| Source: NALFA / EN 13329 abrasion class scale |
AC abrasion classes and the rooms where each one belongs.
3. Water-Resistant vs. Waterproof: The Bathroom and Kitchen Question
Yes, some tile-look laminate is sold for baths and kitchens, but you have to split the claim in two, because a waterproof core is not the same thing as a waterproof floor. Our waterproof laminate flooring guide breaks down that distinction in more detail, and it's where bathroom failures tend to come from.
The core may shrug off water all day. The seams and the fake grout bevels are the problem. Standing water finds the joint between two planks, wicks into it, and swells the HDF (high-density fiberboard) from the edges, even on a plank whose box says "waterproof core." The surface stays fine while the corners lift, and if you're already staring at planks curling at the edges, guide to fixing lifted laminate flooring covers the repair steps.
My rule after years of this: fine for a half-bath or a kitchen if spills get wiped fast and the edges are sealed, risky for a full bath with a shower or a laundry room that can flood. If you want a wet-rated product, a genuine waterproof tile-look laminate is worth reading closely, because the number that matters is how many minutes of surface water it promises. Read that off the product's own sheet, and never assume it covers the seams, because it almost never does.
The path water takes to the core, even on a waterproof-core plank.
4. The Format and Style That Actually Suit the Room
Match the look to the space, because the wrong style fights the room. Concrete and cement prints read modern and cool. Travertine and limestone feel warm and soft. Slate goes dark and textured, and geometric or encaustic patterns work as an accent in a small room, not across a whole open floor.
Format matters as much as color. Big 12x24 and 18x18 planks read as real tile and cut down on the number of seams, which are the weak points. Small square patterns multiply your cuts, your waste, and the linear feet of vulnerable joints.
Watch the repeat in big open rooms. A busy, high-contrast pattern shows every plank repeat once light hits it, while a subtle stone look hides the fakeness far better across a large span.
And if what you really want is wood grain, not stone, that's a different product entirely. Go look at the wood-look laminate route instead, because the printing and plank shape are built for a different job.
| Style | Feel | Best room | Typical format |
|---|---|---|---|
| Concrete / cement | Modern, matte, cool-toned | Kitchens, entryways | 12x24 |
| Travertine / limestone | Warm, soft veining | Bathrooms, living rooms | 18x18 or 12x24 |
| Slate | Dark, heavily textured | Entryways, mudrooms | 12x24 |
| Marble / veined | Bright, high-contrast lines | Baths, powder rooms | 12x24 |
| Geometric / encaustic | Patterned, bold | Accent areas only | Small square |
| Source: The styles I get asked for most |
Common tile-look styles and where each one lands best.
5. What It Really Costs Next to Porcelain
Tile-look laminate is cheaper than real tile, but the savings are mostly in labor, not the box. On my jobs, materials for tile-look laminate typically run roughly $1 to $5 per square foot, against roughly $2 to $7 for porcelain, treat these as ballpark figures, since pricing varies by brand, region, and retailer. That's real, but it's not the big gap.
The big gap is install. A floating laminate floor generally goes down for around $2 to $5 per square foot in labor, while setting porcelain in thinset mortar tends to run about $5 to $14 per square foot because it's slower, wetter, and needs grouting and curing time. That's why a laminate floor that looks like tile often lands at roughly half the installed price of the real thing.
Two things push those numbers up. Basements cost more than open rooms because of moisture prep and often a subfloor buildup, and stairs cost more per step than any flat run. A room full of closets, doorways, and a bay window eats labor hours the open middle never will. I once quoted a job flat by the square foot and a cut-heavy layout cost me a whole extra day, so now I count those areas separately.
| Item | Materials per sq ft | Labor per sq ft |
|---|---|---|
| Tile-look laminate (floating) | $1 - $5 | $2 - $5 |
| Porcelain tile (set in thinset) | $2 - $7 | $5 - $14 |
Source: What I quote, and what retailers are charging
Materials versus labor for tile-look laminate against porcelain. Basement and stair jobs run higher than open rooms.
If you're weighing the total spend against other options across the house, that's part of a bigger laminate flooring cost picture worth reading before you order.
6. The Subfloor: Flatness and Moisture Before Any Plank
This is the check that saves the whole floor, and it's the one people want to skip. Per NALFA's laminate flooring FAQ, the subfloor has to be flat to the manufacturer's spec and a concrete slab has to pass a moisture test before installation. Skip either and the warranty quietly stops protecting you.
Flatness first. A floating floor telegraphs every dip and hump under it, and those high spots are where the locking joints work loose and click underfoot. I run a long straightedge across the floor and mark anything that rocks or shows daylight, then grind the humps and fill the lows before I trust it.
Moisture second. Concrete gives off water vapor long after it looks and feels dry, so you test a slab with a meter, a tool that reads the moisture level, instead of trusting your hand. A customer once talked me into skipping that test to save an afternoon, and the floor cupped before the season was out. I relaid it on my own dime, and that's the day I stopped treating the test as optional.
One more thing that lives here: nearly every floating floor needs an expansion gap around the edges so it can move with the seasons, and the exact size comes off the product's instructions, not a rule of thumb. If you want the full sequence, our how to install laminate flooring walkthrough covers the prep step by step.
7. Sealed Edges and Transitions in Wet Rooms
If this floor is going anywhere near water, the edges decide whether it survives. A bead of the manufacturer's recommended sealant in the seams and along the perimeter is what keeps water out of the joints, and it's cheap insurance in a kitchen or half-bath. Manufacturers slap "water-resistant" on plenty of boxes that still fail at exactly those seams, and sorting the real protection from the label claims is the whole point of our water-resistant laminate flooring breakdown.
Pay attention to the transitions too, the strips where the laminate meets tile, carpet, or a doorway. Those gaps are open doors to the core if a spill runs to them. In a bathroom I seal the perimeter against the tub and vanity and keep the expansion gap hidden under trim, not left open to a wet mop.
Don't silicone the floor solid to the walls, though. It still has to float and move, so you seal the seams and edges against water while leaving the floor free to expand. Get that balance wrong and you trade a water problem for a buckling one.
8. DIY vs. Hire: Be Honest About Which One You Are
Click-lock tile-look laminate in a simple rectangular room is a real weekend DIY job for most people, and that's where the labor savings actually land in your pocket. Flat floor, square walls, a few straight cuts, and the planks snap together.
Where I'd tell you to hire out: a full bathroom with a shower, a laundry room, stairs, or a big open-plan floor that crosses a moisture transition. Those are the jobs where a small mistake at a seam or a slab turns into a callback, and the cost of doing it twice wipes out everything you saved. Stairs alone are slow, fussy, and unforgiving.
Be honest about the room, not your confidence. A square bedroom is forgiving. A bathroom with a toilet flange, a vanity, and a door threshold all in four feet is not, and it's exactly the kind of layout that eats a beginner's whole weekend and still leaks at the edges.
If you're still deciding where laminate fits against everything else in the house, step back to the wider laminate flooring guide before you commit to a room.