
Ask ten installers whether you can tile over vinyl flooring and you'll get yes, no, and "it depends" in the same breath. The real answer: it works only when a short list of conditions all line up, and skipping even one is how tile ends up loose a year later. This guide runs those checks.
Key takeaways
- Tiling over vinyl only works when it's a single, firmly bonded layer with no cushion or felt backing, the wax stripped and the surface scuffed, over a subfloor stiff enough to meet L/360 deflection.
- Sheet vinyl and well-glued vinyl composition tile can sometimes be tiled over; floating LVP, peel-and-stick squares, and cushioned sheet vinyl should come out first.
- Use a modified thinset rated to bond to vinyl (pros often reach for Mapei Ultraflex 2), never plain unmodified thinset.
- L/360 means a 12-foot joist span can flex no more than about 0.4 inch; a bouncy floor cracks grout no matter how good the tile job is.
- When in doubt, tear out the vinyl and set cement backer board. It costs more in labor but ends the risk of loose tile and cracked grout.
Can You Tile Over Vinyl Flooring? The Short Answer
Yes, sometimes. You can tile over vinyl only when it's a single, firmly bonded layer with no cushion, the wax and gloss are gone, and the subfloor under it is stiff enough for tile.
That covers the entire call in one line. Everything else here is how you prove each of those points before you buy a box of tile.
The fear driving this search is real. Nobody wants to spend a weekend setting tile only to find loose planks and a crack running through the grout the next winter. That happens when someone tiles over vinyl that never should have stayed down. That same callback risk is a big part of why some homeowners skip the over-vinyl debate entirely and weigh LVP against tile from scratch before any demo starts.
So treat the rest of this as a series of gates. Pass every one and you can set tile over the vinyl with confidence. Fail a single gate and the vinyl comes up first, no shortcuts.
The tile and grout you walk on last only as long as the layers glued underneath them. A gorgeous porcelain floor set over a weak layer fails just as fast as a cheap one.
When Tiling Over Vinyl Actually Works, and the Stack That Has to Hold
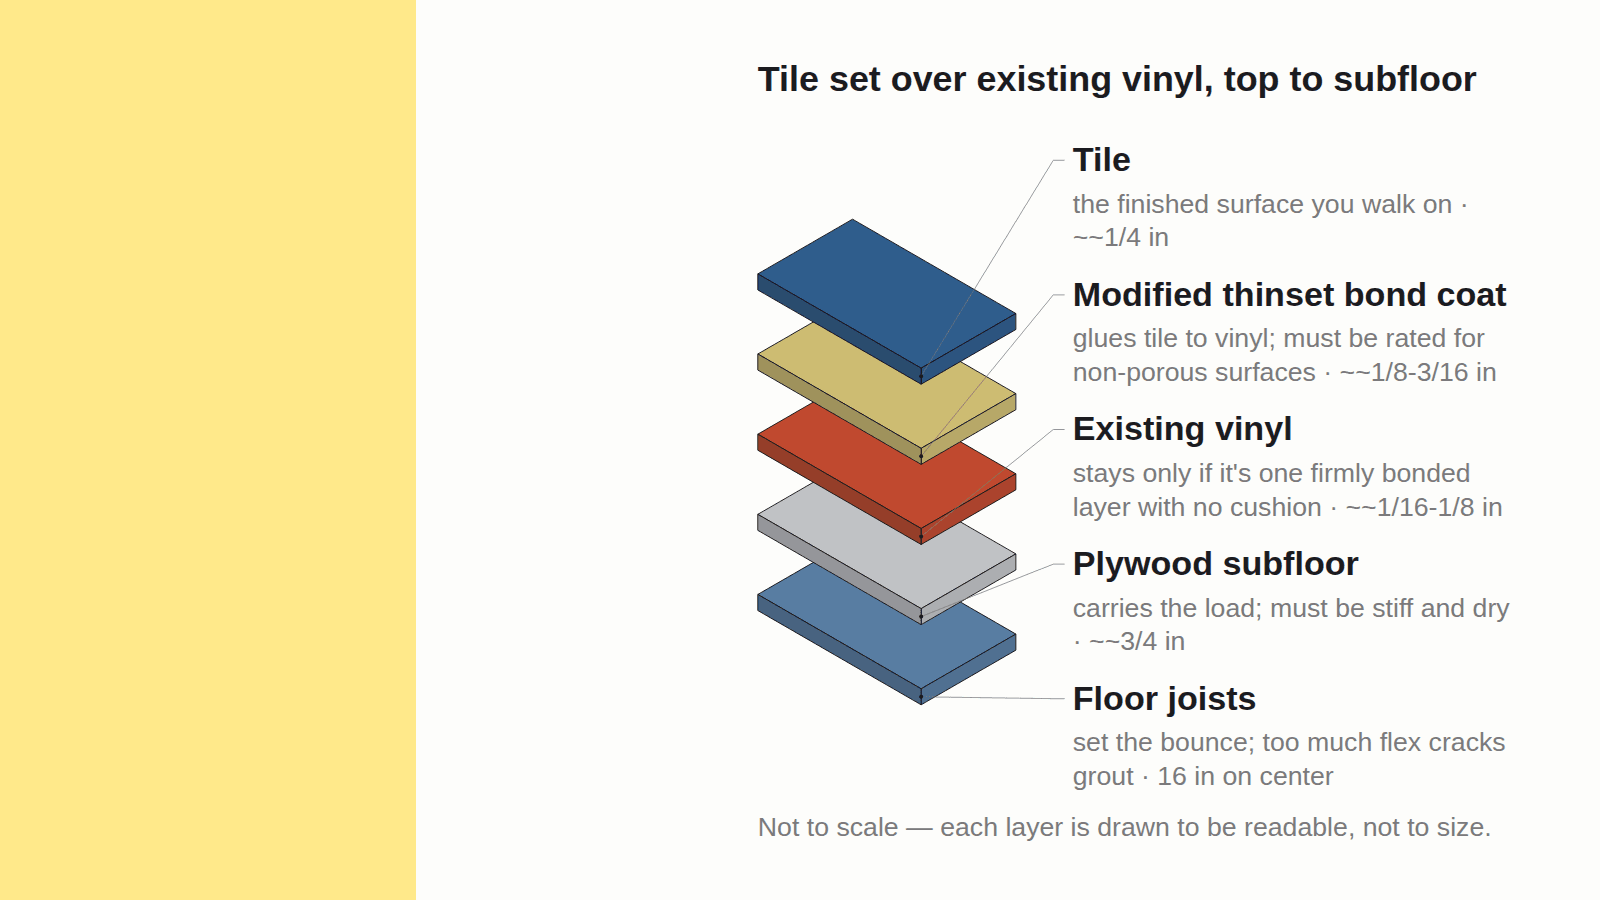
Picture your finished floor as a stack of layers: tile on top, then a bed of thinset (the cement-based glue that bonds tile to whatever's underneath), then the old vinyl, then the plywood subfloor, then the floor joists carrying it all. A tile floor is only as solid as its weakest layer. If any one of them moves, the whole stack moves, and rigid grout is the first thing to crack.
For this to work, the vinyl has to stop acting like a floor covering and start acting like part of the subfloor. That means it's glued tight to the plywood with zero lift at the seams or edges. Press on it. If it gives, bubbles, or peels at a seam, it's a weak layer, and the tile won't survive it.
If you want a wood look instead of square tile, large-format plank tile sits in this exact same stack and follows the exact same rules. Nothing about a plank shape changes the bond test underneath. What plank tile flooring costs and how to order it walks through sizing and quantity once you've cleared the prep here. For a broader look at how wood-style tile compares to the real hardwood it's mimicking, wood tile buying guide covers the trade-offs in more depth.
One thing that makes this easier: a concrete slab. If your vinyl is glued to concrete, there are no joists to bounce, so the deflection worry below drops out entirely. That answers the common "can I tile over vinyl on a slab" version of the question. On a slab you still check the bond and the wax, but you skip the bounce test.
The 6-Point Gate-Check Before You Commit
Here are the six gates, and all six have to pass.
First, the vinyl has to be a single layer, bonded tight everywhere. Not two layers someone stacked over the years, and not lifting at any seam. Second, there can be no soft cushion or felt backing, because anything springy under tile flexes and cracks the grout. Third, the wax, polish, and factory gloss all have to be stripped off and the surface scuffed dull so thinset can actually grab. Fourth, the subfloor has to meet the L/360 deflection rule, covered in the next section. Fifth, it cannot be a floating or loose-lay floor, because a floor that floats moves, and tile can't float with it. Sixth, you use a modified thinset rated to bond to vinyl, never plain unmodified mix.
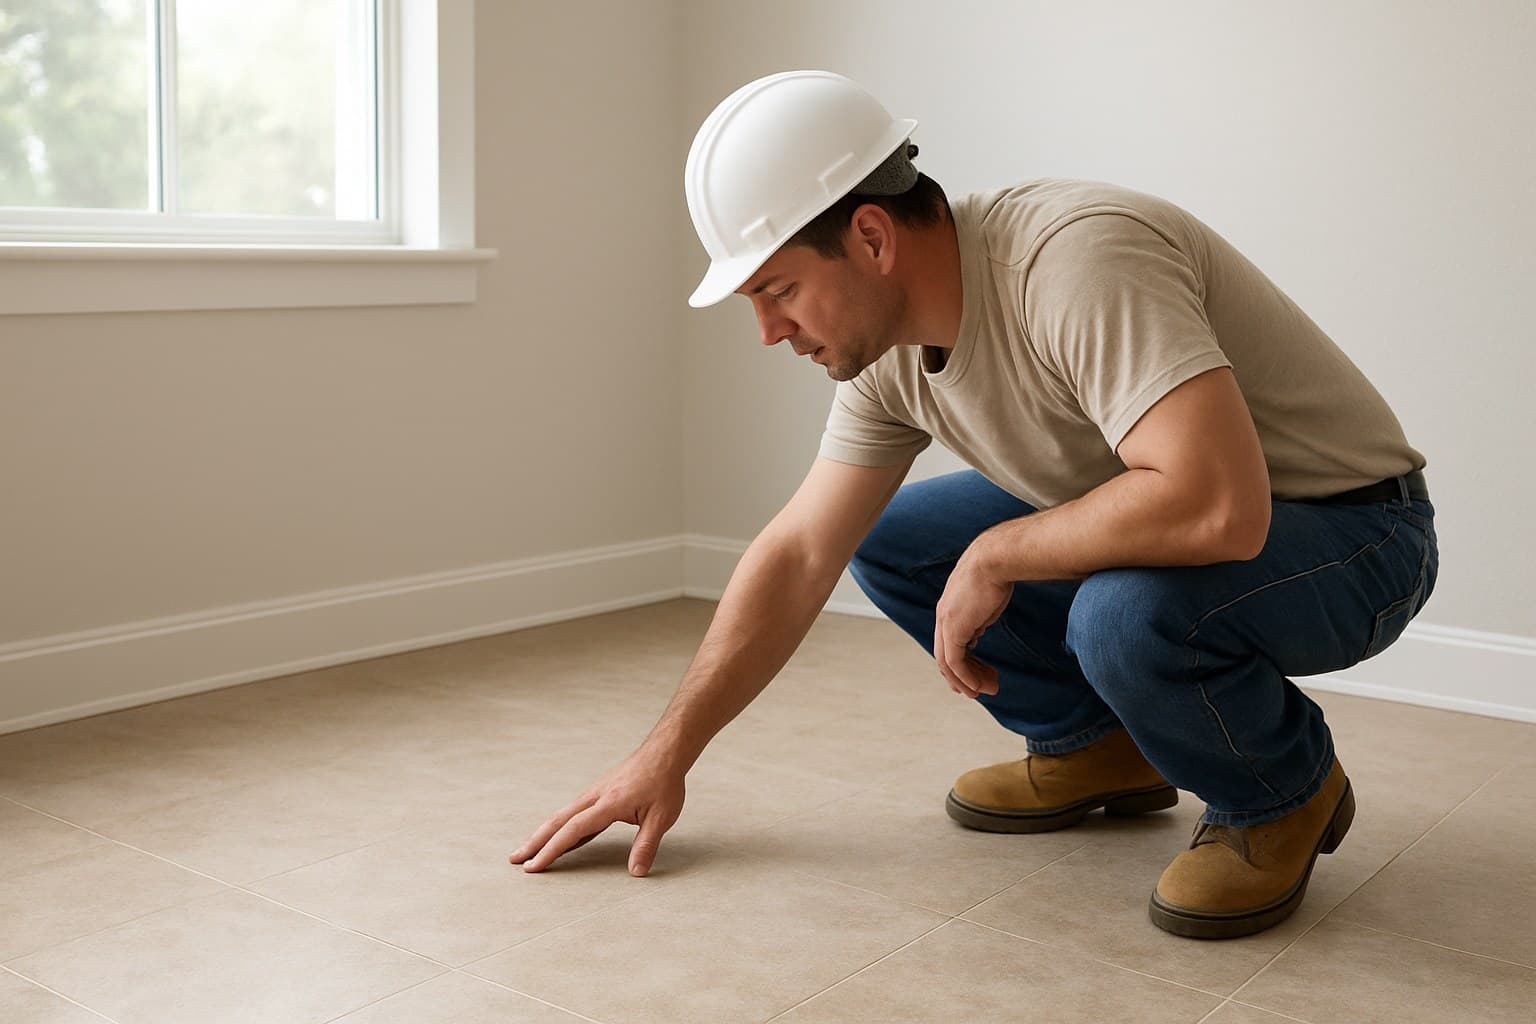
Testing the bond is fast. Get down and press hard on the seams and edges with your thumb, then stomp a heel across the field. Any lift, hollow sound, or give is a fail. To check the backing, cut a small square out of a corner and look at the underside. Felt or foam back there means the floor comes out.
Failing even one gate means tear-out, not a clever workaround. Someone passes five gates, waves off the sixth, and pays for it later.
Here's how to square what you'll read with what you'll hear on a job site. According to the Tile Council of North America (TCNA), tiling over existing resilient flooring can work under specific conditions, provided the floor is a single, well-bonded layer free of cushioning and prepped with the right thinset. Plenty of good installers still refuse to do it, because in the real world those conditions get skipped, and when the floor fails the tile guy owns it. Both positions are correct. The gates are the difference.
Sheet Vinyl vs. Vinyl Tile: Different Verdicts
Don't lump all vinyl together. The verdict changes depending on what you've actually got.
| Vinyl type | Can you tile over it? | Why |
|---|---|---|
| Single-layer sheet vinyl, fully glued, no wax | Possible | Acts like part of the subfloor once scuffed and bonded |
| Cushioned or felt-back sheet vinyl | No | The soft backing flexes and cracks grout |
| Vinyl composition tile (VCT), well glued | Often workable | Dense and firmly bonded; check every edge for lift |
| Peel-and-stick vinyl tile | No | Weak adhesive lets tiles creep and loosen |
| Floating or click LVP | No | A floating floor moves; tile can't float with it |
| Glued-down LVP | Risky | Usually worth removing; thick wear layer is hard to bond to |
Verdict by vinyl type on whether tile can be set directly over it.
A few of these are worth spelling out. Single-layer glued sheet vinyl with no cushion is the one type that genuinely can take tile once it's scuffed and bonded. Vinyl composition tile, the dense commercial-style squares, is often workable too, but check every edge for lift before trusting it. Peel-and-stick squares and any floating or click-lock LVP (luxury vinyl plank) should come out, full stop. The thin stick-down adhesive creeps, and a floating floor is designed to move.
If you're still deciding what vinyl you even have, or choosing a new vinyl floor instead, our breakdown of what makes vinyl flooring last 5 years or 20 sorts the types out. For the dense commercial squares specifically, the guide to Armstrong VCT and what vinyl composition tile actually is explains why it behaves more like a hard tile than a vinyl sheet.
The Deflection Test: Why L/360 Matters
L/360 is the stiffness rule for tile floors, per the Tile Council of North America (TCNA). In plain words, the floor can sag no more than its span divided by 360 when you load it. The longer the span between supports, the less bounce per foot you're allowed.
Here's the arithmetic. Take the joist span in inches, divide by 360, and that's the most the floor can flex in the middle. A 12-foot span is 144 inches, so 144 divided by 360 equals 0.4 inch. That's the ceiling for a floor that long.
| Joist span | Max allowable deflection |
|---|---|
| 10 ft (120 in) | 0.33 in |
| 12 ft (144 in) | 0.40 in |
| 14 ft (168 in) | 0.47 in |
| 16 ft (192 in) | 0.53 in |
Source: the Tile Council of North America's L/360 deflection standard
Allowable floor flex under the L/360 rule, by joist span.
Why this matters: tile and grout are rigid and have almost no give. A floor that felt fine under flexible vinyl can still be too bouncy for tile. Vinyl bends with the floor. Tile can't, so it cracks instead.
You can feel for a problem before you measure anything. Walk the room, then bounce on your heels in the middle of the span between supports. If you feel movement, see a glass of water ripple, or hear things rattle, that floor needs stiffening before tile goes down. On a concrete slab you can skip this entirely, since there's nothing to bounce.
Prepping the Vinyl: Clean, Strip, Scuff, Bond-Test
Prep is where a tile-over job is won or lost, and most guides skip straight past it. Run these steps in order and don't shortcut any of them.
| Step | What to do |
|---|---|
| 1. Clean | Vacuum, then wash off all grease and grime |
| 2. Strip wax | Remove every trace of floor wax and polish |
| 3. Scuff | Sand or abrade the surface dull so thinset can grip |
| 4. Rinse and dry | Rinse off residue and let the floor fully dry |
| 5. Test patch | Set a few tiles, let them cure, then try to pry them up |
The prep sequence to run before setting the first tile over vinyl.
The gloss has to go because thinset won't grab a slick, waxy surface. That shine is engineered to repel stains, which also means it repels adhesive. Strip it, scuff it dull, and you give the thinset something to key into.
The test patch is the step people skip and shouldn't. Set a few tiles, a small square roughly a foot or so across, on the prepped vinyl, let it cure for a few days, then try to pry them up. If they pop free clean with the thinset still stuck to the tile and not the floor, that's your answer: don't tile this floor.
Two more checks before you commit. Flatness matters as much as bond. Lay a straightedge across the floor and look for high spots and dips, because any ridge telegraphs through the tile and cracks the grout along it. And check for moisture trapped under the vinyl, especially in a basement or over a slab. Tape a square of plastic down overnight, and if the underside is damp in the morning, you've got a moisture problem to solve before anything goes down.
Tile Over Vinyl or Tear It Out First? The Cost Difference
Tiling over good vinyl saves you the tear-out labor. Tearing it out and setting cement backer board costs more up front but ends the risk entirely, which is why it's the safe call whenever a gate is borderline. If none of your vinyl passes the gates anyway, it's worth pricing a fresh luxury vinyl plank floor against real tile before you commit to either, which LVP tile cost comparison by wear-layer tier breaks down.
On the material side, expect common ceramic or porcelain tile to run about $2 to $8 per square foot, with thinset and grout adding roughly $1 to $2 per square foot. If you go the backer-board route, the board itself is cheap, around $0.40 to $0.60 per square foot, but it comes with its own screws and a thinset bed under it. Within that porcelain range, the stone-look lines like limestone-pattern porcelain tend to sit at the higher end of the spread, so limestone-look porcelain tile cost guide is worth checking before you budget the material line.
Labor to set tile typically runs $5 to $12 per square foot, and it climbs for small rooms, busy patterns, and tight cuts. Pulling up vinyl adds roughly $1 to $3 per square foot in labor, plus haul-off. Basements and stairs cost more than an open room, because of moisture prep below grade and the slow, piece-by-piece work on treads and risers.
On the thinset itself, don't cheap out. Use a modified thinset rated to bond to a non-porous surface, some installers report good results with products like Mapei Ultraflex 2 for this kind of over-vinyl bond, but always confirm compatibility with the manufacturer's current specs before you buy. Plain unmodified mix is meant for a different job and won't hold to a vinyl face.
As for DIY versus hiring out: setting tile on a flat, open, ground-floor room that passed every gate is within reach for a patient DIYer. The jobs worth hiring are the ones that fail quietly. Stiffening a bouncy subfloor, getting a clean tile-to-wood transition at a doorway, running large-format plank tile flat, and tiling stairs are all where a pro earns the money. The tile-to-wood transition especially is where I slow way down on my own jobs, because the two floors are almost never the same height and a sloppy strip there is the thing people trip on and notice every day. Hexagon layouts belong on that same hire-it-out list, since the grout-line and cut decisions covered in our guide to hexagon tile decisions that cause callbacks are easy to get wrong on a first attempt.