
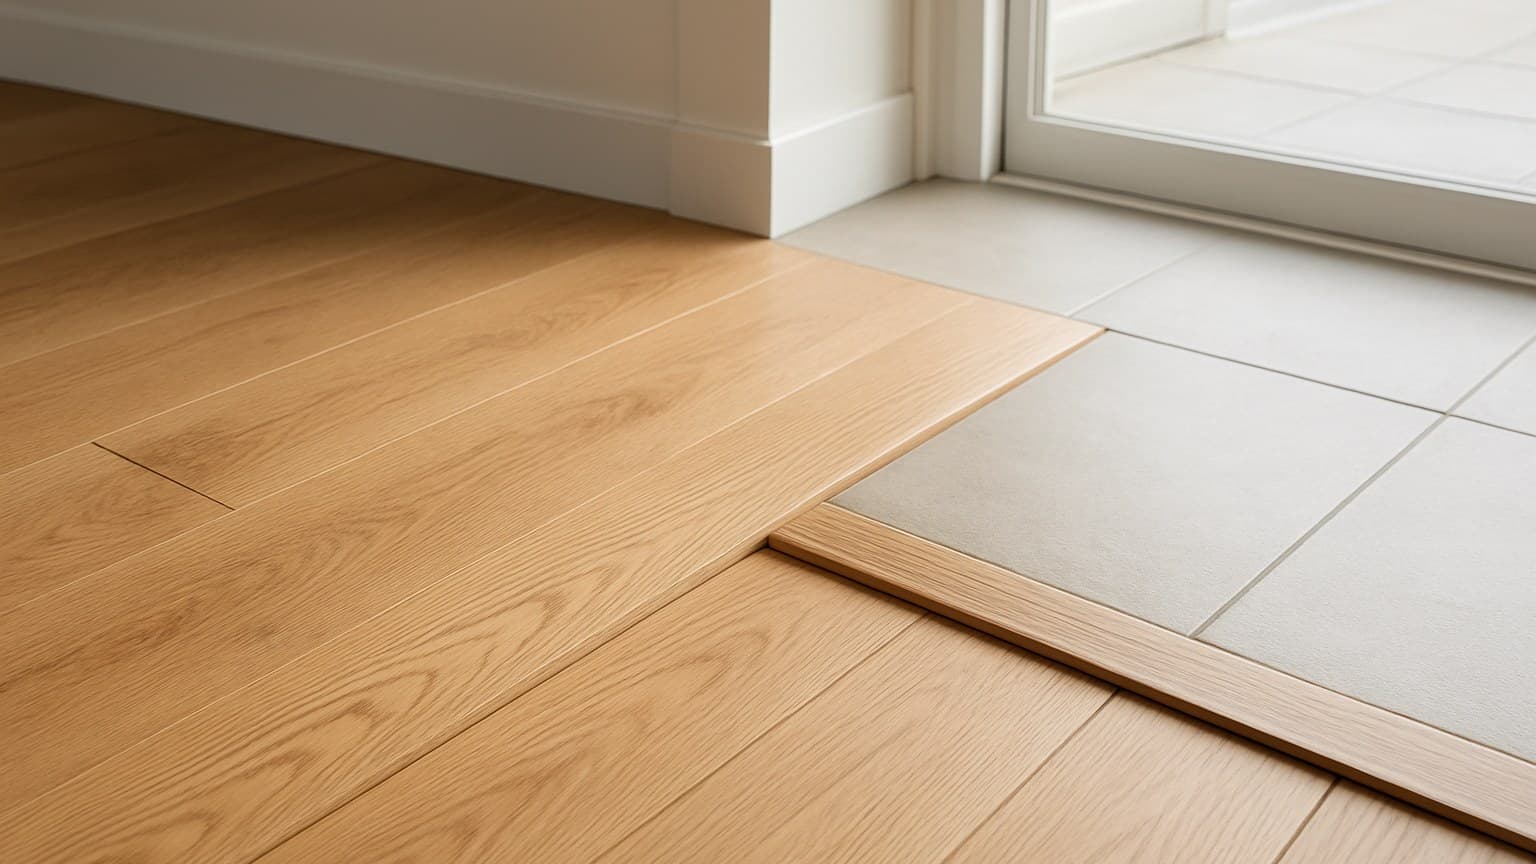
Put a metal edge strip in the thinset with the tile and you've picked the transition that survives a foyer best. It caps the tile edge that chips first when wet boots, dog claws, and dropped keys hit it. The hard part is that a foyer tile to wood transition fails at the seam, not the plank face, so the right choice hangs on your subfloor more than the strip you like. Get that backward and you're re-grouting a cracked seam inside a year.
I've pulled up and relaid a lot of entry floors in Dayton and Columbus houses, and the ones that come back as problems almost always failed in the same spot. Here are eight transitions ranked by what actually holds up to mud, standing water, and traffic, worst case to best, with the one I reach for most at the top.
Key takeaways
- The safest pick for most foyers is a metal edge strip set in thinset with the tile, because it armors the tile edge, which is the first thing to chip under boots, claws, and dropped keys.
- Strip or no strip comes down to the subfloor: a flush no-strip joint only survives over a stiff, low-movement slab with a flexible caulked seam, while a wood-framed subfloor needs a strip plus an uncoupling membrane.
- Tile usually sits higher than the wood once you add thinset, so a reducer or a stone saddle is the realistic choice; T-molding only works when both floors are dead level.
- For the tile side of a foyer, pick a PEI 4-5 tile for wear and a higher R-rating for wet grip; polished stone and polished metal both get slick with wet boots.
- Epoxy 'river' fills rank last in a real entryway: epoxy is rigid, the wood moves with the seasons, and the seam cracks loose within a year or two.
What a Foyer Does to a Transition (and How I Rank Them)
A foyer is the meanest room in the house for a seam. Grit rides in on boots and grinds the joint like sandpaper. Snowmelt and rain pool right where tile meets wood. Pet claws scratch, keys and phones get dropped on the hard edge, and the whole floor turns slick the second it's wet.
Almost every failure I see is at the seam or the exposed tile edge, not on the face of the tile or the plank. The face is tough. The edge is where it chips, and the seam is where water gets in.
Strip versus no strip isn't a style call. It's a subfloor call. A stiff concrete slab that barely moves can take a flush, caulked joint. A wood-framed subfloor, meaning OSB (oriented strand board) or plywood over joists, moves with the seasons, according to the Tile Council of North America's OSB FAQ, that seasonal movement is exactly why a rigid seam over a wood-framed subfloor can crack. Over wood framing you want a strip plus an uncoupling membrane under the tile, a thin layer that lets the tile and subfloor move a little independently so the tile doesn't crack.
Two tile specs decide how the entry holds up. PEI is the surface wear rating; for a foyer you want PEI 4 or 5 so grit doesn't dull the glaze. R-rating is wet slip grip, and a higher R means more traction under a wet boot. Polished anything scores low here.
The 8 Foyer Transitions at a Glance
| Method | Handles | Wet-Boot Survival | Slip | Best Base |
|---|---|---|---|---|
| 1. Metal edge strip | Small height difference | Excellent | Good if brushed, slick if polished | Slab or wood-frame with membrane |
| 2. Hardwood reducer over a gap | Tile higher than wood | Very good | Good | Any, covers the wood's expansion gap |
| 3. Stone or marble saddle | Small to medium height difference | Excellent | Honed is fine, polished is slick | Solid base set in thinset |
| 4. T-molding | Equal heights only | Good | Center spine can catch a toe | Dead-level floors |
| 5. Tiled doormat inset | Design on the tile field | Very good | Depends on tile chosen | Still needs a real edge detail |
| 6. Flush hand-cut joint (no strip) | Equal heights | Risky | Good | Stiff, low-movement slab only |
| 7. Mosaic inlay band | Equal heights | Fair, high upkeep | Good (lots of grout) | Solid base, epoxy grout |
| 8. Epoxy river fill | Equal heights | Poor | Slick when wet | Climate-controlled show floor |
Source: ranked from the foyer floors I've pulled up and relaid over the years
Eight foyer transitions ranked by how they hold up to wet boots, with the slip and subfloor notes that decide each one.
1. Metal Edge Strip: The Most Boot-Proof Pick
A metal profile set into the thinset with the tile wins because it armors the one weak spot. Boots, claws, and dropped keys hit metal instead of the glazed tile edge, so the edge can't chip.
It handles a small height difference between the two floors, and it works over both a slab and a wood-framed subfloor as long as you pair it with an uncoupling membrane under the tile. That's why it's my default. If your height gap runs wider than this strip can cover, it's worth comparing it against the other tile-to-hardwood transition options sorted by height gap.
Watch the finish. A brushed or textured strip holds a wet boot fine, but polished metal gets slick the moment snow melts off someone's shoes. For an entry, skip the mirror finish.
2. Hardwood Reducer Over an Expansion Gap
A reducer is the pick when the tile sits higher than the wood, which is almost always the case once you add thinset under the tile. It ramps down from the tile to the wood and hides the gap at the same time.
The trick is anchoring. A reducer has to lock into a track or screw to the subfloor, never nailed through the wood flooring itself. Wood planks shrink and swell with the seasons, and if you pin them down they'll gap or buckle somewhere else. Leave that movement free.
This is a solid foyer choice when you want to keep real wood on the living side and still give wet boots a clean little ramp to step over. The same wood-or-tile call shows up in kitchens that sit next to hardwood, where the question is whether to tile the kitchen floor next to hardwood or run the wood straight through.
3. Stone or Marble Threshold Saddle
A solid stone bar set in thinset across the seam shrugs off grit and standing water, and it reads as a classic entry detail. This is the saddle you've stepped over in a lot of older homes.
The one trap is finish. Polished stone is slick when it's wet, so go with honed or lightly textured stone that holds a boot. If you want the stone look to match your tile field without the upkeep, a limestone-look porcelain tile saddle gives you the same read with a tougher, less porous surface. Porcelain itself is manufactured rather than quarried, which is one reason it's worth knowing is porcelain a natural stone before you compare it to a real stone saddle.
4. T-Molding for Equal-Height Floors
T-molding only belongs where the tile and wood finish dead level. It sits in a track, caps the gap between them, and lets the wood move underneath.
The problem is foyers rarely come out level. Add thinset and the tile usually sits proud of the wood, and the raised center spine on a T-molding becomes a toe-catcher and a mop-snagger in a busy entry. I pulled one out of a Cincinnati split-level where the owner kept kicking it loose. The moment the tile sits higher than the wood, this is the wrong part.
5. Tiled 'Doormat' Inset With a Bordered Edge
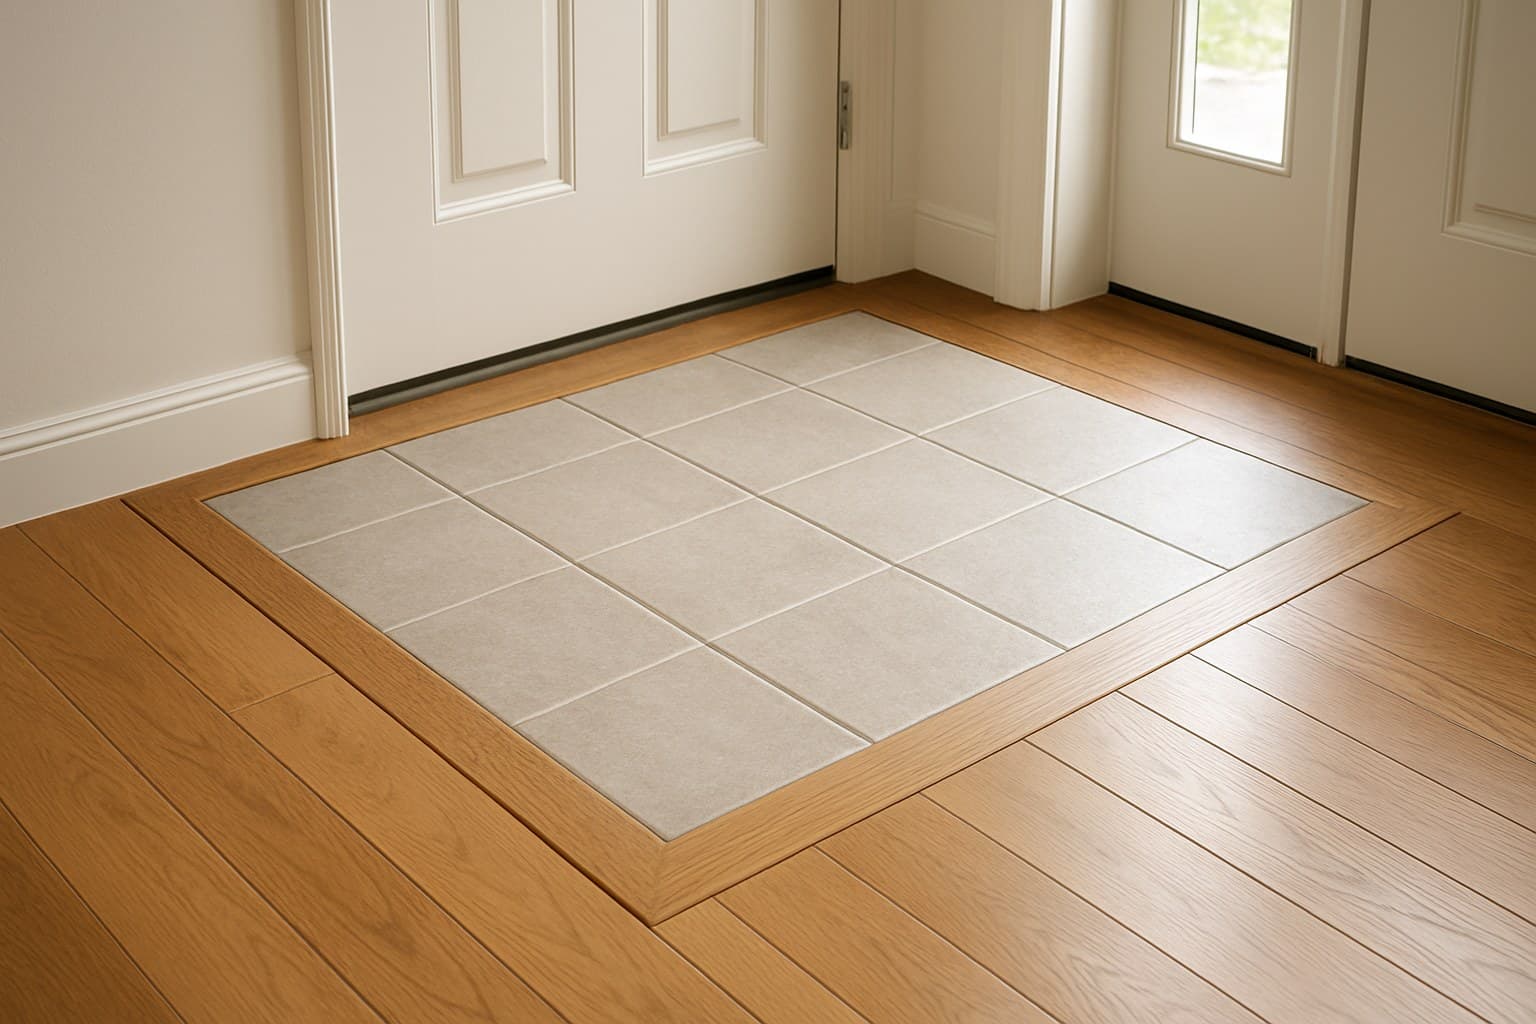
A bordered tile "rug" right inside the door catches grit and water before it ever reaches the wood, and the tile field itself takes abuse all day. It's a good-looking way to handle a high-traffic entry.
Here's the catch most people miss: the doormat is a design sitting on top of a transition, not a replacement for one. Where that tile field meets the wood, you still need a real edge detail. Pair it with a metal strip or a stone saddle at the wood seam so the whole thing holds up to boots. If you're drawn to this look, our guide on combining tile and wood in one room walks through pattern and layout.
6. Flush Hand-Cut Joint With No Strip
This is the one everybody wants and the one most likely to fail. It's the seamless hexagon or herringbone edge cut to slot straight into the wood, no strip at all. Gorgeous photo, risky floor. If you go this route, laying out a hexagon field so the cuts land evenly along that seam takes some planning, which is where a hexagon floor tile layout guide comes in handy.
The reason it fails is simple: both edges sit fully exposed. On a moving wood floor or a weak subfloor, the rigid grout cracks and the unprotected tile edge chips under boot traffic. In a foyer that's the harshest spot in the house to try it.
There's a narrow case where it survives. You need a stiff, low-movement concrete slab, an uncoupling membrane under the tile, and a flexible, color-matched caulk at the seam instead of hard grout so the joint can flex a hair. Over a bouncy OSB or plywood subfloor, don't. It's the best-looking pick and the highest risk, and that trade-off only tips in your favor over a solid slab.
7. Mosaic Inlay Band
A mosaic strip bridging the tile and the wood looks like a custom accent, and it can be a nice one. But every one of those little grout lines is a place foyer grit and water work their way in.
Grout stains fast in an entry, and if the base flexes even a little, those small tiles can pop loose. If you go this route, use epoxy grout, which resists staining and water far better than standard grout, and set it over a rock-solid base. Our mosaic tile install guide covers how to keep those lines straight.
Treat this as a decorative accent for a lower-traffic entry, not a workhorse seam.
8. Epoxy 'River' Fill (Ranked Last for a Reason)
Poured epoxy between the tile and the wood looks custom in photos, but it ranks last for a real foyer. Epoxy cures hard and rigid, and the wood next to it never stops moving with the humidity.
The seam cracks and lets go at the wood edge, usually within a season or two, and polished epoxy is slick the second it's wet. I'd only consider it on a climate-controlled show floor where nothing moves much. In a house with real seasons, skip it.
Subfloor Prep, Moisture, and the Expansion Gap
Prep is what the whole seam quietly depends on, and it's where most failures are really born. Flatness first: run a long straightedge across the transition area, grind down the high spots, and fill the lows with leveling compound. If the tile rocks or sits high because the floor waves, no strip will save the seam.
Then check moisture on the tile side before you set anything, especially over a slab. A slab that reads wet will wreck a wood floor sitting next to it, so you want a dry reading and the right membrane before you trowel thinset. Flatness and moisture are the two checks the box's warranty quietly hinges on, not the fancy edge you picked.
Leave the wood its expansion gap. According to the National Wood Flooring Association's (NWFA) Homeowners' Handbook to Real Wood Floors, nearly every wood and floating floor needs a gap around the perimeter so it can expand and contract with humidity, and the exact amount comes from that product's own instructions, not a number off the internet. The transition part, strip, reducer, or saddle, is what hides that gap, so size the gap first and let the part cover it.
On DIY versus hiring out: a click-lock reducer or a metal strip in a track is realistic for a confident DIYer, and the materials for either stay cheap, mostly just the cost of the strip, track, or reducer itself. Setting tile in thinset, running an uncoupling membrane, or cutting a flush no-strip joint at a doorway is fussy, unforgiving work, and that's where labor costs climb, since you're paying for tile-setting skill instead of a strip you can screw down yourself. Exactly how much that labor adds depends on the method, your region, and how much tile and membrane work is involved, so get a couple of local quotes before you commit rather than go by a flat number. If you've never set tile, that entry seam is the wrong place to learn, and I'd hire it out. I clean and prime every substrate carefully, because in an entry it matters, and I've watched a rushed, dusty prep job lift a seam inside a season.
If you're still weighing tile against a plank-tile look on the living side, our plank tile flooring guide breaks down what that material costs and how to order it.